Monthly Archives :

June 2021

Gravel Camp: Day One Dirt Adventures

1024 753 Patrick
All the Colors at Camp!

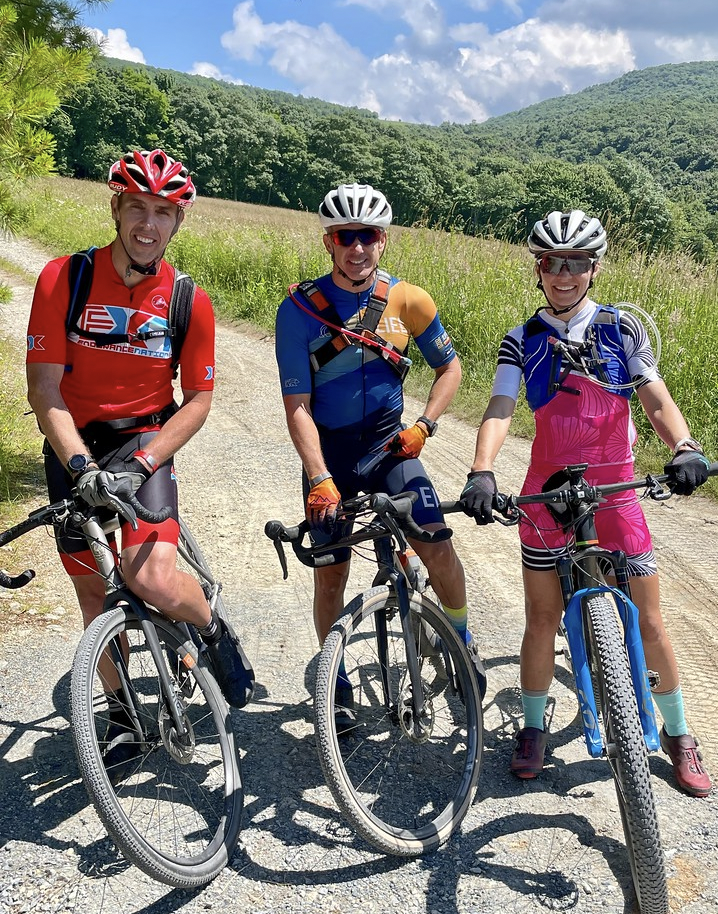
Note: This is the first of three updates from our first annual Gravel Adventure Camp. Early Registration for 2022 is open, and camp space is limited. Learn more on the 2022 event page.

After much planning, scheming, and dreaming we finally held our first official gravel camp! Camper consensus was unanimous — the wait was 100% worth it. Every day had rides ranging from 5 to 6 hours (that’s just ride time!) and adventures galore.

We’ll be back in 2022, and if you can handle six hours on the bike and grades ranging up to 18% at times, you should consider grabbing one of our limited spots with a 100% refundable deposit.
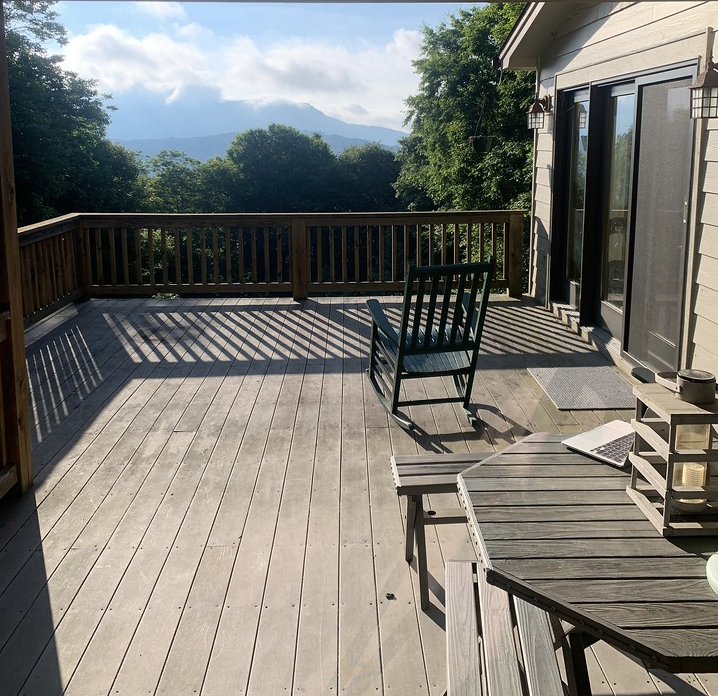
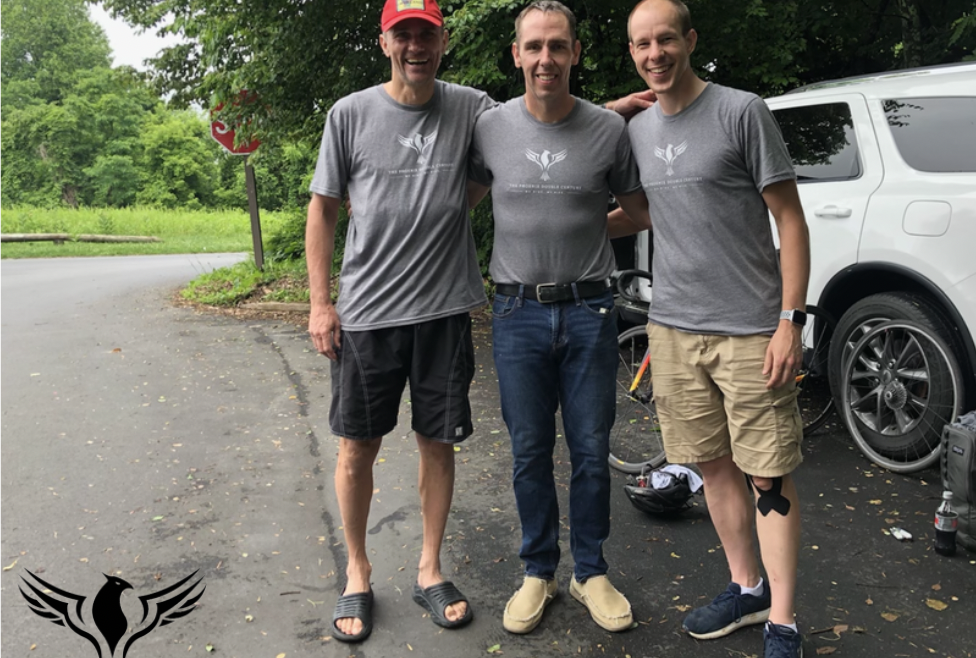
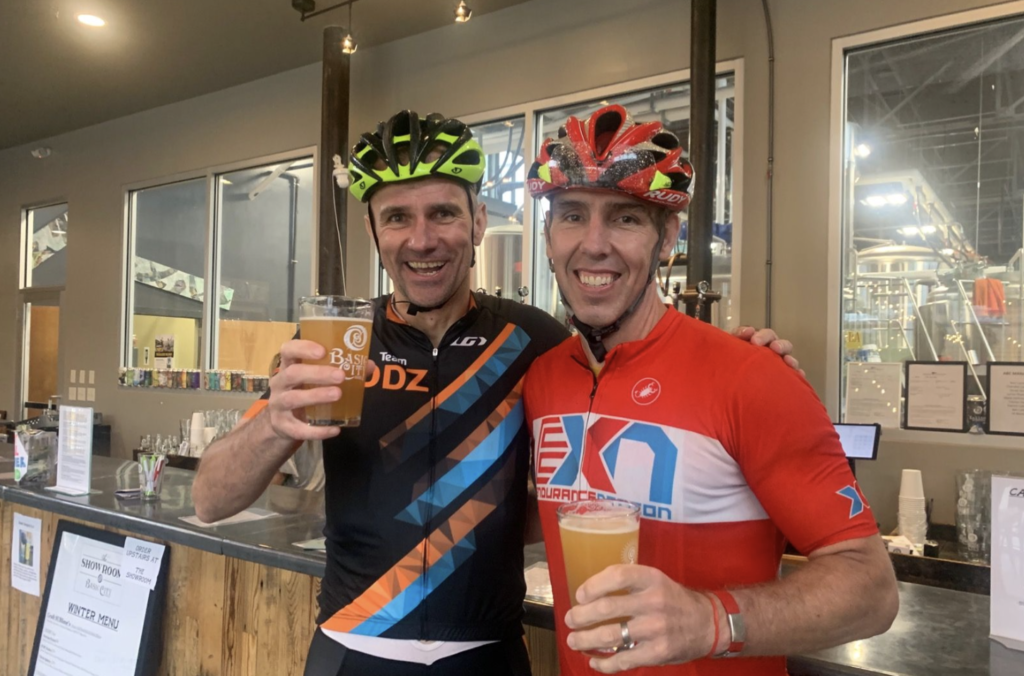
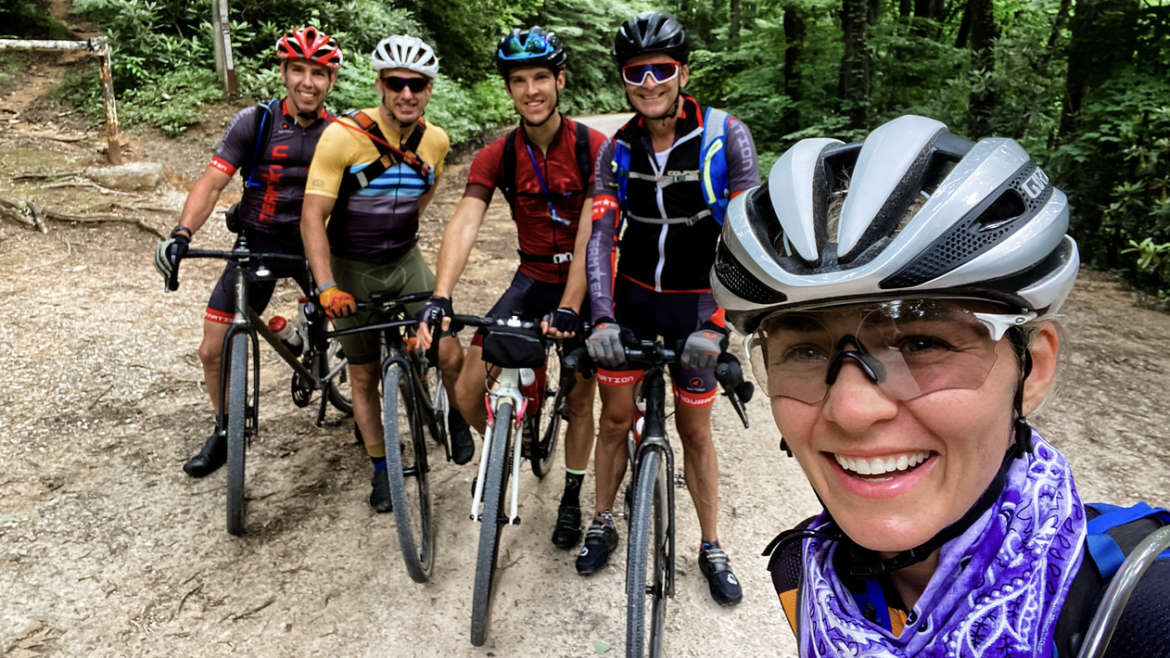
The View of Grandfather Mountain from Gravel Camp HQ

Settling In

The first order of business after the drive out to Linville was assembling bikes and making new friends. We took care of the friends part on Wednesday night with a pit stop in Banner Elk at the Kettell Brewery. Then it was on to Gravel Camp HQ for bike assembly and unpacking.
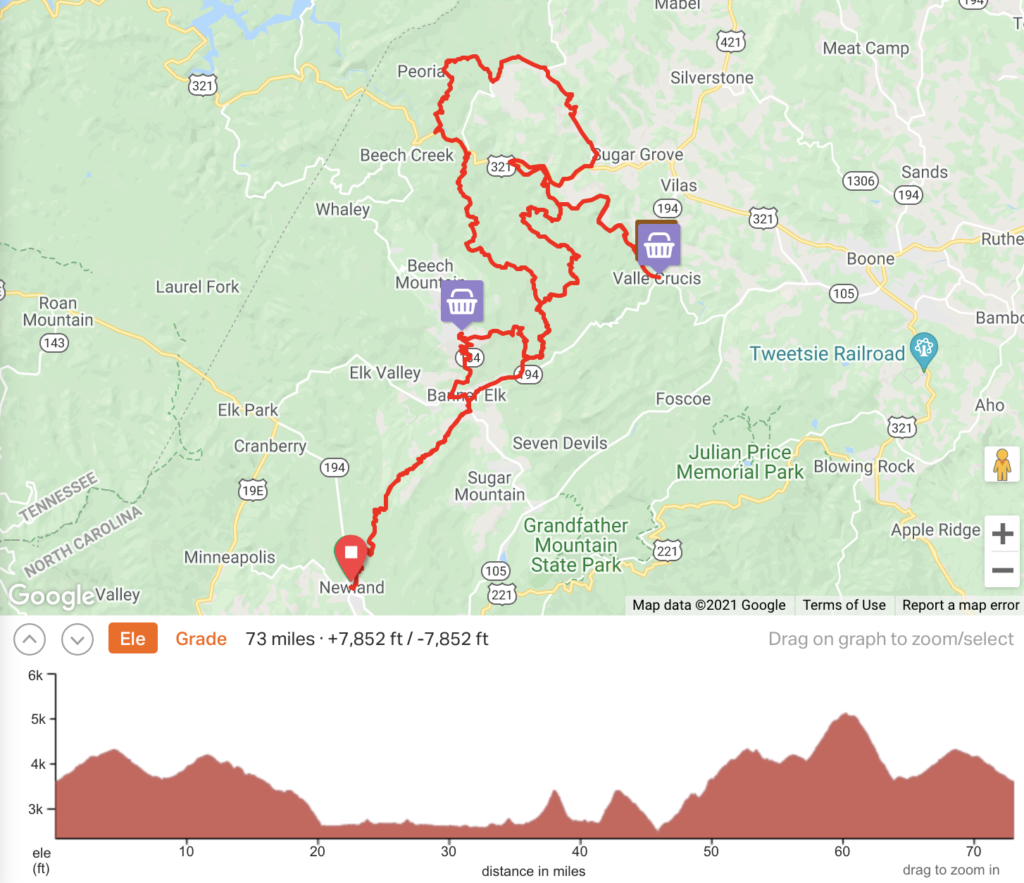
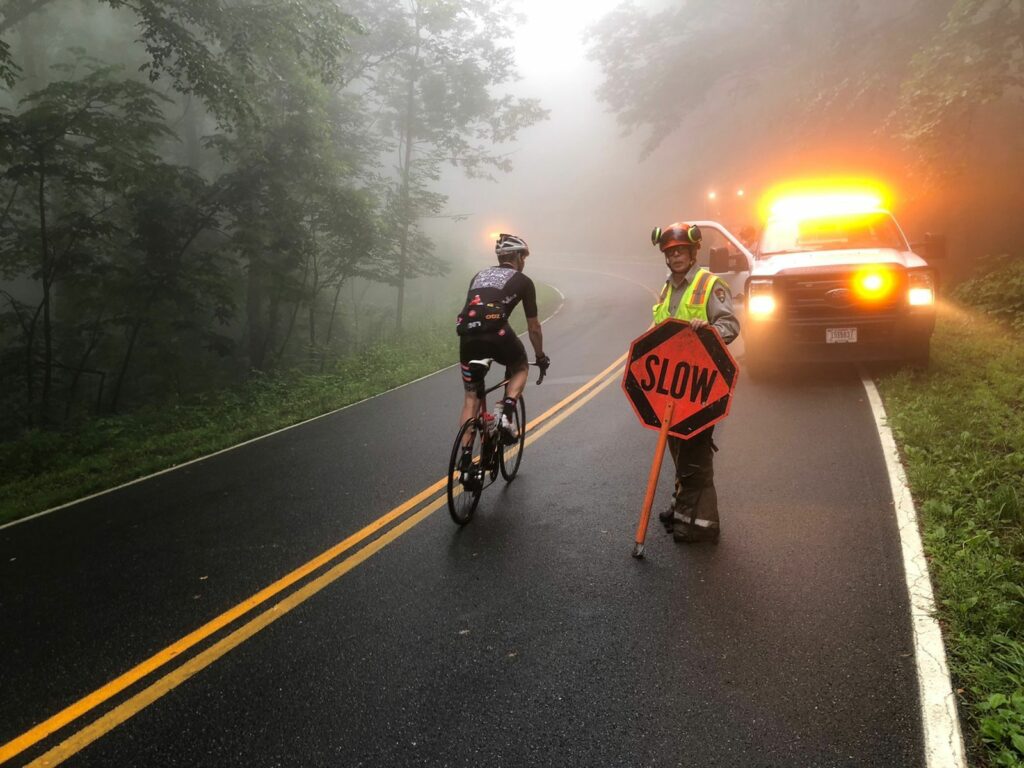
The Overly Ambitious Route for Day One
The River Road to Valle Crucis

Off the Beaten Path

Mast Gap General Store

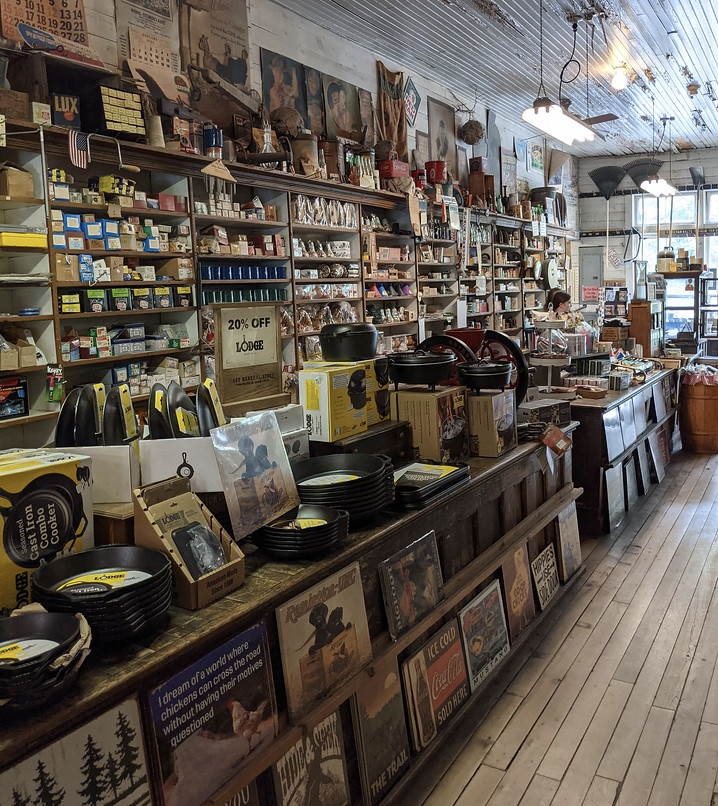
Mast Gap General Store Pit Stop

Ouch. No really.

When Hard Becomes Gravel 

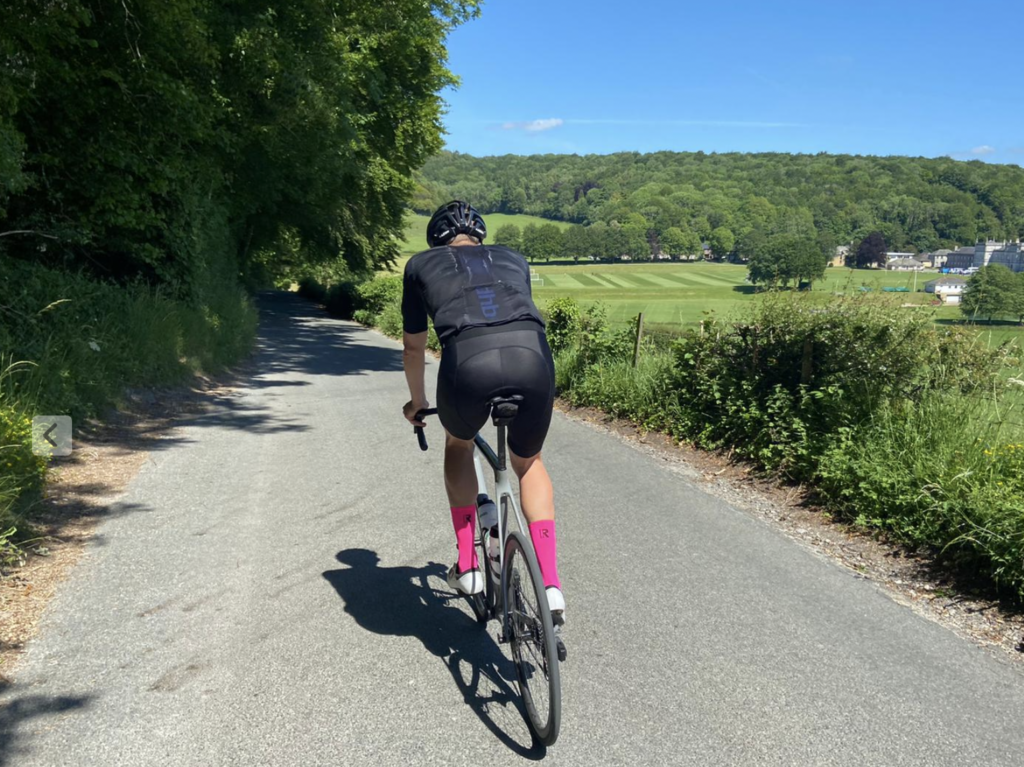
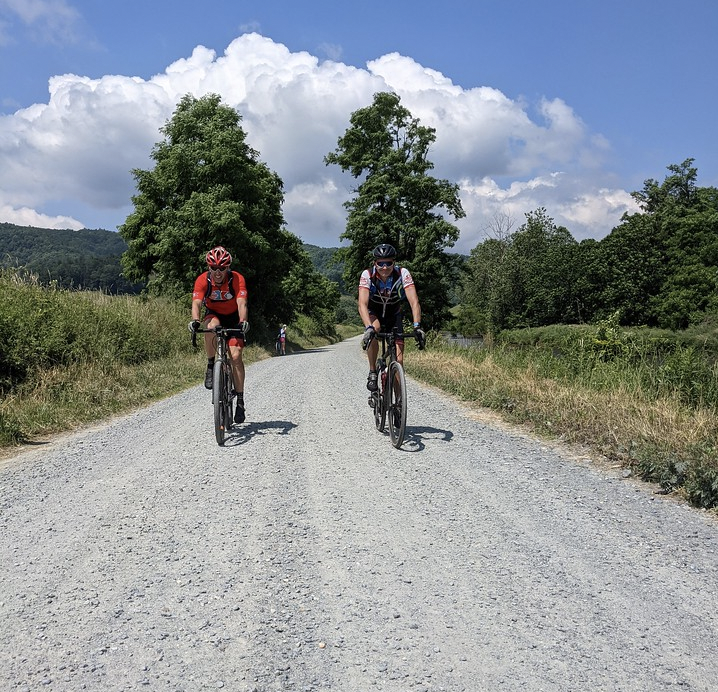
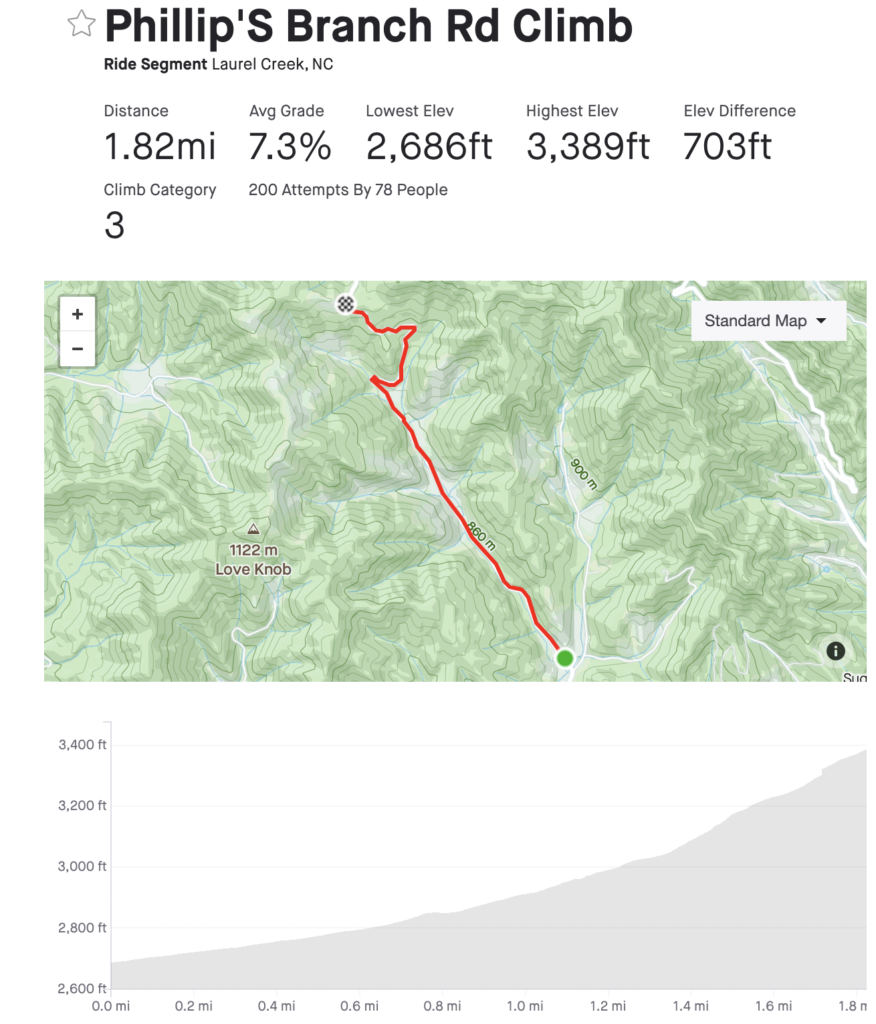
As if sneaking up the backside of Beech Mountain wasn’t enough, we decided to add a few additional gravel sections for some fun.

One of these was Philips Branch Road (above), where a punishingly steep straight shot gives way to gravel and switchbacks. Add a random pickup truck pulling a bobcat and you’ve got the recipe for total suffering.

This was only topped by a second, equally strong segment up by Bob’s Adventure. A little shorter this time wasn’t much solace as we were all hurting from the prior climb. We did get to meet “Bob” in his John Deere mobile, and he even offered us a beer. Unfortunately, oxygen was our top priority at the time! 🤣

Friendliness Wins

Heading back to Beech after this “bonus” loop, we realized just how low on water we were. Lucky for us, we came across a small church, a very nice gentleman and a spigot with endless cold water!

Shortly thereafter, our adventure was derailed by a dead end road (and a 10 foot high fence covered with signs). Google maps, it would seem, hadn’t exactly captured the nuances associated with this particular dirt road in the middle of nowhere!

Lesser of Two Evils

Sitting on the side of Beech Mountain, we had to make the call. Push onwards or start the journey home.

After many turns and stops, the truth of about riding gravel really sunk in: it takes time to enjoy this level of awesome!

So, we made the right call and ended up having our official lunch at roughly 4pm in Banner Elk! It was amazing and just in time. The climb home wasn’t any easier, but at least we weren’t starving!

Dinner at Lost Province

We wrapped the day with Dinner in Boone, NC. First for the delicious pizzas at Lost Province Brewing. Second for a proper late-night supermarket so we could stock up on provisions for tomorrow night’s dinner.

With the help of many calories, we mapped out our adventure(s) for the second day!

The Official 2021 Phoenix Challenge Report

976 774 Patrick

The first annual Phoenix Challenge Ride is officially in the books! After months of planning and strategery, it’s hard to believe I’m sitting here on a Monday morning writing this post. Congratulations to all of the riders, whether you took the Half or the Full challenge. 

Our motto: We Ride. We Rise. The Phoenix Challenge is here to push your limits. To challenge what you think is possible. To help you unlock fitness and mental strength. Our handpicked route is a one-way ticket; with only two-wheels to get back you have your own personal mission. 

It was a total blast, the perfect combination of social time, cycling, and suffering. We certainly hope that you will join us again for another adventure soon! Follow along at www.weridewerise.com for future Phoenix Challenge updates. 

DCA Reagan International Airport

Pre-Ride in Front Royal

After weeks of training and final ride preparations, it was time to go and find elevation to make us fitter and stronger. The hotel was approximately a 90-minute drive from Reagan international airport. Totally easy to get there, and right off the highway. Lots of stores and places to get food, so we opted for Chipotle for some fresh calories. Paul from Black Bear Adventures rolled in at 9pm and was ready to go — he’s so prepared 24/7!

Riders continued to arrive on their own schedule, and checked in online. The only issues we had the morning of our folks who decided to drive in that day. If possible, staying overnight the day before makes a big difference and relieves a lot of stress. 

Day One: Dickie’s Ridge to Waynesboro

The admin team was up bright and early, on site for a check in around 7 AM. Lots of coffee was needed!

This is our first chance to meet many of the riders, and hear their stories. It was great to see new friends and old connecting as they strategized for the day. 

The official ride start time was 9 AM, but many opted to leave early according to their fitness and ride expectations. The wet weather meant extra layers were in order, as well as flashing lights on the front and back of every bike. Given the nature of Skyline Drive being on a ridge, the weather is highly variable. 

Slow is Smooth, Smooth is Fast.

Most riders headed South, aiming for a 104-mile ride. A select few decided to ride back to the park entrance, adding another 8 miles and a few hundred feet to the equation — why not!?

There are three stops along the ways with stocked stores and shelter: Elk Wallow, Big Meadows and Loft Mountain Wayside. Each approximately 30 miles apart. 

Taking those into account, we were able to stage support as needed along the road and use Big Meadows as a more extended lunch break. We needed it; if only because the wet weather meant we were burning extra calories from a healthy amount of shivering! 

Lunch at Big Meadows was the perfect pit stop; more than one person opted for some hot chocolate / coffee! The yummy handmade bars were also amaze; pretty sure I personally at about a shopping basket’s worth!

The further we went the more the weather added a degree of difficulty to the equation. Wet roads are one thing, but the fog really made for some dramatic riding! 

By the time we got to Loft Mountain, we were ready for a coke and some solid downhills. The draw of Basic City Brewery kept us laser focused, and I have to be honest a beer never tasted better.  

We Survived Day One!

We ate our fair share of salad, pizza and nachos before retiring to clean bikes and prepare for the early start on Day Two. No rest for the wicked!

The Official Data

Day Two: Waynesboro to Dickie’s Ridge

We woke slightly earlier on the second day to pack up and have all of our gear ready for pick up. Rolling out to Basic City Brewing parking lot, the group met up and began the climb out of Waynesboro to Skyline Drive. 

While a few early departing folks skipped ahead, everyone had to deal with the challenging terrain from yesterday – in reverse! 

Personally I was tired, but my legs actually felt better on Day Two. I think there is a little more variety in the early terrain that made it easier to get into a rhythm than the strong challenge of the first day.

There were no skipping stops this time, as calories were in high demand. In fact, almost all the SAG food was gone by the time we finished the day. 

The weather was once again very dynamic. There were bouts of sunshine and stunning views interspersed with fog so thick, finding the food at Big Meadows required a better sense of smell than eyesight! 

The final push was as tough as advertised. If not for a Coke and Twix at Elk Wallow, I might not have made it. Rolling up to Dickie’s Ridge and my car was pretty darn satisfying. Mission accomplished, and it was time to cheer in the other finishers as they completed the route. 

The Official Data

Half and Full Finishers

Not everyone was able to do the full two-day tour. The course is tough, and these folks earned Half Phoenix honors. For those able to go the distance, the Full Phoenix recognition is theirs. Stay tuned for our Hall of Fame page on the website at www.weridewerise.com by the end of June. 

That Sock Game

Virtual Finishers, Too!

That’s right, there we even a handful of riders in the UK who decided to take the Virtual Phoenix Challenge. They charted their own two-day adventure to earn the right to be a Phoenix finisher. They even had better weather than we did; we might have to go abroad next year!

The Final Numbers

My two-day totals were 226 miles and 21,000 feet in 12 hours ride time. Add in 20+ new friends plus countless memories and it’s clear the event was a great success. 

We can’t wait to do this ride again in 2022, so be sure to join the Mile18 newsletter list to get early bird sign up links, discounts and regular training advice. 

Happy riding!

~ Patrick, Chief Phoenix

Seven Critical Steps to Prepare for Your Epic Century Ride

150 150 Patrick

Getting ready for a century ride or epic cycling event is actually a lot of work. You’ve been following a cycling training plan for weeks now, but the logistics matter too! The closer you get to your century, the more clear it becomes that even one small misstep can really ruin your experience at the entire event. 

Here is our list of 7 key ways to guarantee the best possible ride experience at your next event. 

#1 Reservations & Rentals Check (14 Days Prior)

If your event involves traveling to a different location, this significantly amplifies the early portion of your logistics.

If you have a flight, or a hotel, or even a rental car, then you’ve got some serious planning to do. And if you have all three? Well, you had better be ready.

Make sure that you have the proper reservation information saved readily on your phone. Not just in your inbox, but actually copying and pasting the confirmation number into calendar events for the day and time that you’ll be there.

For example, take that rental car confirmation number and create an event on your calendar to trigger at the time that you are disembarking the plane. This way, future you will have the information s/he will need without extra work. 

If you are flying, then make sure you sign up for text notifications on the flight status. Add airport travel time reminders to your calendar so that you won’t be late. All that extra time to deal with your bike and checking that in safely with the airline. Have your frequent-flyer number and credit card ready to deal with all relevant Logistics and additional expenses.

Bonus Item:  Find and save the phone number and information for a local bicycle shop in case you need it.

#2 Key Contact Information Check (12 Days Prior)

 Traveling to this event means being a part of something bigger than just a regular ride. Make sure that you have saved the relevant information to your contacts so that you can easily access that information in the future even without an internet connection.

Cut the event side, you’ll want to know not only the agenda for what’s going to happen but also who the point of contact is. Be sure to save the phone number as well as an email address.

If your event involves an airport pick-up or rental car, make sure you have that separate information dialed in as well and that you’ve sent your itinerary over according to the information you captured in step one above.

Many events use a digital communication app or product for the weekend. Be sure to have that installed in your phone with your relevant information in it as well. If you haven’t done so already, make sure that it works! Send a message, read a message, like and reply to a message —  just to know that everything is operating properly. This is not something you want to be doing on the morning of your event.

Of course, you should have your emergency contact information also readily available. Especially if it’s not someone who you would normally identify. having all of this line up ahead of time is critical for safety and peace of mind.

#3 Check the Weather ( 10 Days Prior)

 you probably don’t need a reminder to do this, as it’s likely you’ve been checking it for weeks! Most extended forecasts are made approximately 10 days in advance, but the accuracy of those forecasts very wildly. 

Use the information from the forecast to plan accordingly. Working macro from micro, start first by identifying key factors like sunrise and sunset. Capture the lows and highs of those days as well, which will set some baseline expectations about pre, during, and post-ride clothing needs.

Finally, look at the weather for the time of your event. You should continue to update this once a day as the event nears. At at least right now you have a 50% chance of knowing what the day is going to look like. 

 this information is critical to make sure that you have all of the requisite equipment end gear needed to be safe and successful. Some of these items take time to cure, so having the information earlier gives you extra time to solve any problems.

Balancing the forecast against the macro numbers you have, you can begin to narrow down your clothing choices appropriately  (see #4 below). 

#4 pack your gear

 now that you know what the weather will be, and you have a good sense of the right parameters, you can begin sorting out your gear.

Before you start putting anything into a bag or suitcase, use this visual packing method first.

Take everything you think you might need and put it in a pile on your floor. Picking it up from the ground, use your bed as a display case for the clothing that you will be bringing. 

Riding for two days? Two jerseys go in the upper left-hand corner, and to bib shorts go in the top middle. Two pairs of socks go on the right! 

Anticipate cooler mornings? A vest and arm warmers go in the left-hand corner. 

Always feel safer with gloves on? Put those in the bottom center. 

Concerned about inclement weather? Bring a rain vest for a jacket in the bottom right. 

Laying things out visually allows you to make sure you have everything you need. You can easily reference your list and the items displayed on the bed in front of you. If needed, you can add and subtract items until you feel just right. Only then should you begin packing things into your bag. This is the best way to make sure that you have everything you need and you haven’t left anything behind.

Side Note: Always bring an extra set of kit and additional warm weather clothing. Once you stopped writing, even on warmer days, your body can get quite cold. You’ll want the gear just in case. Of course, if you’re going to be going to a warmer climate, be sure to pack the sunscreen as well.

#5 Your Final Workouts

Let’s not forget that you actually need to be ready to ride when you hit the ground! We don’t want to shut down your training too soon, as you’ll start experiencing the effects of losing your fitness. Depending on the level of your peak fitness and the demands of your event this may or may not be an issue. Regardless, you have a habit of training and disrupting that can simply affect you mentally if not physically.

This is why we recommend having a scripted set of training sessions for the final seven days. You will need to block out the days where you’re traveling, but setting this plan in place ahead of time ensures that you will comply with what’s written.

In general, oer the last seven days you want to stay active in a general sense. Every session you can do on your bike, the better. If not your bike, then perhaps an indoor bike or to extradite you have at home (so smart to have more than one bike!). 

 if you can’t fight, stay active with the short run or similar aerobic activity. If anything, this can help you stay sane. The only real caveat here is that we don’t want to do anything that’s risky. A new event is right around the corner and there’s plenty to be done. If you couldn’t train whatsoever in the few days leading up to the event, you would still be okay. Unhappy, but okay. 

In terms of intensity, most of the sessions should be aerobic in zone 1 or zone 2. If your event involves play intensity efforts, then two of your sessions should include short bursts of intensity at race pace effort with plenty of rest. An example for example, twice through four minutes at threshold effort with six minutes of recovery.

#6 Pack the Bike

With your last few sessions done, you can go ahead and pack your bike. You can make this process a lot easier by blocking out the time in your calendar to get this done. Perhaps you can use that day’s workout window to get this done.

Before you pack your bike, give it a once-over. Clean it up and make sure that everything on the bike is in good condition. If there’s a problem, you want to be able to solve it now instead of in a new town or city. 

Open up the case to have all of your tools ready. Have a decent-sized ziploc bag to hold any parts you remove, and another one for the tools. Each tool that you use to disassemble your bike, when finished, should go into the ziploc bag that you’re taking with you to the event. This way you know that you will have all of the tools you need at your disposal for everything that is on your bike.

Take your time to do this right, ensuring that your bike is safely secured. Regardless of the type of case that you have, improperly packing your bicycle adds significant risk to the travel equation. 

Avoid packing extraneous heavy or sharp items inside with your bicycle. An empty bottle or two, for example, is fine. Adding your nutrition powder and energy bars end a bicycle pump is not encouraged. This adds to the weight of your bag and can jeopardize the stability of the bike itself. Do your best to keep those extra items in your checked bag.

Side note: We recommend traveling with your helmet, shoes, and pedals in your carry-on bag. In the event that your bike doesn’t make it, at the very least you have the minimum required to hop on a new bike if you’re able to secure one on site. 

In addition to your bike, be sure to also pack the extraneous items that orange clothing but are related to cycling. This goes for your computer and requisite charging cables. Safety lights, sunglasses, spare tires, etc. Perhaps even the cleaning rag. Note that you cannot travel with co2 cartridges on an airplane, so have a plan in place to secure those when you arrive. 

#7 Test the Bike

Once you’ve arrived and made it safely to your lodging, it’s time to put the bike back together again.  Even if you pick your ride up on-site, it’s time to give it a once-over.

You have time now before the event to fix any problems you can find. If you wait till the morning of the event, you run the risk of having to ride with that problem or not being able to ride it all.

Do your best to put the bike together safely and get outside to give it a short ride. Go through all the gears, make sure the brakes work, and that everything feels fine. Check the tire pressure and attach all the safety lights. 

Your goal here is to go to bed the night before the ride with everything in place, 100% ready to go.  Guaranteed you’ll sleep better. 

Happy Riding!

Five Reasons You Need to Elevate Your Cycling

150 150 Patrick

Epic Cycling

Climbing is a critical part of your cycling arsenal and you overall development as a two-wheeled athlete. It’s not just about adventure; if you want to be strong and competitive, you need to ride outside and find hills. Riding hills can make you a better, stronger, and faster cyclist. 

So when people think about riding hills, most of us are struck with fear right in the heart. “Oh my god, hills, I hate them!”

No one is immune. There was a period of time in my cycling career where, after a tough race, I literally would go around hills. I added extra miles just to avoid the hills that I would discover on my route. Why? Because I had been beaten down by a bad hill experience. 

It wasn’t until I learned to embrace the hills that I started to become better as a cyclist. Here are five reasons why you need to head to those hills and start getting stronger.

The First Reason is Cadence. 

So climbing the hills actually really forces you to become one with your cadence for a variety of reasons. 

First and foremost, we have to start using all the gears on our bike. Most cyclists only really use one or two gears. The rest of the cogs in their rear cassette are super shiny. Or maybe the trainer is the default setting and the full range of the cassette isn’t needed. A consequence of this scenario is our rider is not using the full range of their body’s strength.

Riding at different cadences, whether it’s in the small ring or the big ring, forces you to recruit different muscles. It also changes the way that you think about powering your bike. 

You can change the level of torque that we’re putting into the pedals: the higher the cadence, the lower the torque, the lower power per rpm.

And so as you start climbing hills, sustained climbs, you have to get into a rhythm with your cadence. Climbing hills forces you to do that. It feels uncomfortable at first because it’s just not something that you normally do. The sooner you get better at handling different cadences and managing your choice of cadence (knowing which type of gear you want for this particular section of the hill), the better you’re going to ride. 

You are going to stop losing those precious seconds from shifting errors. As a climber, you must retain that precious momentum, otherwise you will really slow you down between gear changes or transitions of the terrain.

The Second Reason: Your Position

So when you’re climbing the bike and you are going up either a steep or a sustained climb. Typically athletes will shift to the back of their saddle. Their hands will go on top of the bars — on the hoods — not down in the drops.

You should sit tall and focus on getting air in through your diaphragm. And in that position of being pushed back, we also get to change how we torque on the pedal. Sometimes being able to push a little more forward and down (rather than just down) can be a helpful change. 

Additionally, you focus on pulling up on the pedals as well as pushing down. This will help you master the art of turning better circles at lower RPMs. This can become a comfortable space, and climbing hills will help you improve this skill. 

Adapting your position to the terrain helps you to stay comfortable. It also enables you to continue to apply pressure to those pedals. So getting comfortable in that climbing position will actually make your stronger cyclist. It gives you a new position that you can take on when you’re on the flats or another terrain.

The Third Reason: Relaxation Under Stress

When you’re grinding up a hill there comes a time when you are out of gears, you’re clicking, and it’s not going. It’s like not happening. 

The answer is clear: you are going to have to work. 

This is when cyclists get tense. For example the hands really start to grip the bars. You can see it up on the shoulders which are super high. They’re using every fiber of their muscle to help their quads and their glutes push that bike. This doesnt’ help your legs, and actually is the source of a lot of wasted energy.

Take a look at professional cyclists. They make climbing and suffering look easy. This is because their body is relaxed. In a way, this relaxation lets them do even more work.

You need to find a space inside the “work” of climbing that is still relaxed for you. This way, when you feel that tension and the pull of gravity on you can still find places to relax. 

Which part can you relax? Can you drop those shoulders? Can you change your breathing? Can you stretch out your back a little bit? Can we shift in the saddle? How are you going to find space inside that strength to be comfortable?

We’re transitioning from that flat, I’m going fast, I’m getting this big return on my work mode…over to this climbing section where the capacity for returns has shrunk dramatically. It’s almost a claustrophobic feeling. Finding a way to get comfortable inside this tighter space is really important. 

It’s an important part of your cycling progression to become better at handling extreme amounts of stress and other places when you’ll ride, which are like sprint finishes or other climbs or places during the bike ride where excessive power is actually to your advantage.

Learning how to climb in that situation is an opportunity to do that a little bit in slow motion. So you get better at recognizing the the enemy that is pain, and you can wrestle with it a bit and come to terms with it right on your own, which I think is really important. 

The Fourth Reason: Developing a Standing Rhythm

One of my biggest pet peeves is riding with triathletes (yes, I am one!) who decides to stand up. Because the minute they stand up, their bike comes backwards right into your front wheel, unless you’re super careful. And that’s because triathletes don’t have a good sense of what it means to keep tension on the pedals.

Even when they’re transitioning from seating to standing as a result, that bike starts to jerk back. And you can tell the difference between someone who can climb smoothly or someone who’s climbing quickly. And someone who’s climbing with rhythm, right? If you think about it from the dance floor, you know what rhythm is on the dance floor, calming your bike is also very similar.

If you’ve watched some of those pro cyclists ride, men and women are like, and when they climb that bike is just rocking underneath them and they’re just moving up that hill, it’s one fluid motion, and they’re going versus what I believe most of us look like. We’re just grabbing those bars as tight as you can.

And just jerking from side to side. And just praying that every ounce of energy we have is going into the pedal into the drive chain, into the wheels, into the road and getting us over the top of this really grueling hill. So climbing actually forces you to develop a rhythm outside of the saddle, which I think is really important.

We all have a cadence that we’re familiar with when sitting. But are you familiar with your standing cadence and know how that can become an asset for you? Just even down the road, again, launching into a sprint, picking up some momentum over the top of a hill, or just giving your back a break for a little bit and standing for 10, 20 minutes, the more comfortable you get a standing, the better off you can be.

Power-User Tip: When standing, you want to get your shoulders over the tops of the handlebars bars. If you’re standing, you should be able to look straight down on top of your hands. You can do a lot of work there with the core muscles that are going to fatigue super early. Stand tall on that bike and develop a new standing for them. 

The Fifth Reason: Descending

One of the reasons that people don’t like to climb is because they have to go down the other side. Becoming comfortable with descending, especially if you’re a fortunate enough to be in a group ride, is a super power user skill. If you can handle your bike going fast on a descent, then you can handle your bike on the flats at half the speed.

Descending and bike handling are critical skills whether you ride off-road, road racing, or just riding for fun. Even triathletes can benefit from better bike handling skills. Descending is a great place to learn because we don’t have to worry about braking or shifting. 

Descending is all about weight, distribution management, picking your line, things that we need to be doing when we’re on the flats, when we’re transitioning from a slight downhill to a flat or from a flat to a slight uphill picking our line, how do we want to handle it?

For most people learning how to descend downhill starts by riding downhill with someone else, following their line, and learning their body language.

So definitely pick someone who you think is a good descender or ask around and find someone who isn’t. Do your best to stick safely behind them at a safe distance. You can manage it and pick up some new descending skills. 

Moving Forward

So when you’re thinking about your training and you hesitate at a hill, don’t turn around. Go straight up that hill. 

You’re going to do what your can with the gears on your bike. You’re going to work on your cadence. You’re going to work on your positioning. You’re going to find comfort inside the stress. 

Find that rhythm that works for you on the hill. And then finally enjoy the reward of the descent. Focus on those bike handling skills. Catch your breath as you zip up that jersey again. It’s time to get back to work and be ready for that next hill. Ride on!